Difference between revisions of "Finding the Space Between Lead Shots"
(→Plan 1) |
|||
| Line 53: | Line 53: | ||
|2 ||Box+Pb ||0.00676 ||0.00842972 ||<math>2.63*10^{10}</math> ||<math>4.21*10^{-3}</math> | |2 ||Box+Pb ||0.00676 ||0.00842972 ||<math>2.63*10^{10}</math> ||<math>4.21*10^{-3}</math> | ||
|- | |- | ||
| − | |3 ||Box+Pb+<math>H_{2}</math}O ||0.01616 || 0.0251288||<math>7.84*10^{10} </math> ||<math>1.26*10^{-2}</math> | + | |3 ||Box+Pb+<math>H_{2}</math>}O ||0.01616 || 0.0251288||<math>7.84*10^{10} </math> ||<math>1.26*10^{-2}</math> |
|- | |- | ||
| − | |4 ||Box+<math>H_{2}</math}O ||0.01384 ||0.02116136 ||<math>6.60*10^{10}</math> ||<math>1.06*10^{-2}</math> | + | |4 ||Box+<math>H_{2}</math>}O ||0.01384 ||0.02116136 ||<math>6.60*10^{10}</math> ||<math>1.06*10^{-2}</math> |
|- | |- | ||
|} | |} | ||
=== Plan 2=== | === Plan 2=== | ||
Revision as of 16:48, 16 July 2008
Plan 1
By Mass
1 - Empty box, m 1
2 - Box filled with Lead, m 2
3 - Box filled with Lead and H 2 0, m 3
4 - Box filled with H 2 0, m 4
m Pb = m 2 - m 1
V Pb = (m 2 - m 1) / ρ Pb
m H 2 0 = m 3 - m 2
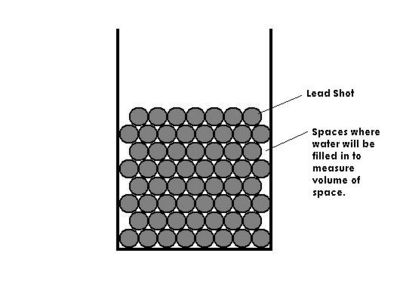
V H 2 0 = (m 3 - m 2) / ρ Pb = V SP (The space between the lead)
ratio = V Pb / V tot
Plan 2
By Volume
1 - V H 2 0 1 = V tot
2 - V H 2 0 2 = V SP
V Pb = V tot - V SP
R = V Pb / V tot = (V tot - V SP) / V tot => 1 - (V SP / V tot)
Experiment
Plan 1
We had 2 scales to measure the weight. Let's call them scale #1 and scale #2, measurement on them were called weight #1 and Weight respectively.
|- |Mesurements |Discriptions |masses |weight #1 (£) |weight #2 (£) |Weight AVE (£) |Weight AVE (g) |- |1 ||Box || 0.02401 ||0.00402076 || || |- |2 ||Box+Pb ||0.00676 ||0.00842972 || || |- |3 ||Box+Pb+}O ||0.01616 || 0.0251288|| || |- |4 ||Box+}O ||0.01384 ||0.02116136 || || |- |}
