CLAS12 R1 Stringing Manual
The information contained on this page is taken directly out of the stringing manual written by George Jacobs.
A pdf version of this page can be found here: https://wiki.iac.isu.edu/index.php/File:CLAS12_Region_1_Drift_Chamber_Wire_Stringing_Manual.pdf
Purpose
This manual is written for the detector wire stringing and instrumentation crews who may not be familiar with the technical aspects of the detectors they will be building. It is intended to provide a basic project orientation for the personnel hired as stringers and fabricators for this part of the project. This is a training manual as well as a practices and procedures manual for detector fabrication, stringing, testing, and instrumentation. Requirements and procedures are listed and explained and safety issues as they pertain to the tasks outlined.
Introduction
The CLAS12 is a multiple component detector system designed to track and identify subatomic particles resulting from an electron beam or photon beam interaction with a target. The drift chambers track the path of these particles as they pass through the detector. The 18 drift chambers will be configured in 3 regions of 6 sectors each to track these particles. Each of the 18 detectors has the same basic geometry. Each of the 6 sectors in each region are identical. Region 3 (R3) is approximately 50% larger than region 2 (R2) and region 2 is approximately 50% larger than region 1 (R1). When complete, they will be arranged into a 360° array of approximately 45° acceptance.
Each region of drift chambers will be strung by a different group in a different location. The R1 detectors will be strung at Idaho State University (ISU), the R2 detectors will be strung at Old Dominion University (ODU), and the R3 detectors at JLAB. Each location will have it's own team to string and instrument the detectors they are responsible for. The same basic stringing procedures and requirements will apply to all 3 regions of detectors.
The scientific basis for detector operation is unrelated to the structure or type of mechanical framework used to position and support the wires. A drift chamber (DC) operates because of the gas, wires, high voltage, and electronics. DC detectors have been in use for experiment or experimental station at a particle accelerator or collider. DC design and operational characteristics have been well studied and documented. DC operation can be explained using elementary physics.
As a charged particle or photon passes through a gas-filled chamber containing field and sense wires biased at negative and positive high voltages, it ionizes the gas due to the strong electric field. The resulting electrons drift toward the sense wire further ionizing the gas creating more electrons in an avalanche effect until they reach the sense wire where they induce a current pulse. This current pulse is amplified by the on-board electronics and then to the data acquisition system. The position of the original ionizing track can be determined from the time it takes the ionization electrons to travel to the sense wire as both the electron drift velocity and signal processing times are known. The drift velocity is determined from the voltages, size, and shape of the drift cells. The data acquisition system then processes the data to reconstruct the particle tracks.
CLAS12 central detector consists of 3 regions of drift chambers and a superconducting toroidal magnet. The magnetic field causes the particle track to bend according to it's momentum. The particle then leaves the magnetic field and enters the R3 detector to track the resulting path. This information used in conjunction with the data from the other parts of the spectrometer can then be used to identify the particles.
The Detectors
The detector is made up of 2 end plates which position the wires and support the wire tensions. A back plate, nose plate, and frame support position the end plates relative to one another. The gas volume is contained by aluminized mylar windows, 0.001" thick in R1 and R2, but for R3, the upstream window will also be a 1 mil aluminized mylar window, but the downstream seal will be a composite shell for structural strength. Each of the 18 detectors will have 1440 sense wires and 3600 field and guard wires. The total force on the end plates due to wire tension is 1000 lbs.
Each of the detectors is assembled in a precise manner and to align the end plates relative to one another. This will position the wires within the design tolerance. Wire position must be precise in order to track the particles within design resolution. Because of the high voltages required to operate this type of detector, materials and cleanliness standards must be strictly adhered to. High voltage breakdown can be caused by an inviable fingerprint on a surface. High voltage can cause chemical breakdown and chemical reactions in contaminant materials and vapors. Requirements for an operational detector are a pure and exact gas mixture, perfectly clan and smooth wires, the proper combination of wire diameters, proper voltages, infinite ground planes, and an operational data acquisition system.
The total lifetime of a detector is determined by 4 major factors:
- Total radiation exposure
- Gas characteristics
- Detector design
- Fabrication Techniques
The total radiation that a detector can be exposed to represents the maximum possible life span a detector can have under perfect circumstances. This is the bottom line in detector longevity. This is determined by wire damage due to current. Nothing lasts forever and even gold plated wires will wear out.
Perfect circumstances include a perfect gas mixture which has no contaminants. All contaminants cause detector degradation. Some contaminants can rapidly and permanently degrade a detector. The planned gas mixture of Argon and CO2 is a clean mixture of pure gases. Most of the contaminants in these gases are not harmful. So, in our case the greatest change for contamination is during the fabrication and stringing process.
Solvents and lubricants used in the manufacturing process of many detector components must be removed and the components cleaned to vacuum standards. This is not a viable option for some components which may require alternative manufacturing and fabrication techniques to produce clean components free from contaminants. The use of solvents, glues, epoxies, tape, lubricants, and improper materials will shorten detector life. Using materials that out gas, using the wrong glues or epoxies, using excessive amounts of glues or epoxies will create an ongoing long term source of contamination.
Detectors are strung in a clean room with all persons wearing appropriate clean room clothing. Gloves are worn and are changed frequently to prevent any contamination from human touch. Hair nets are worn will all hair tucked inside to prevent hair contamination. Masks are worn in the case you must work in close proximity to the wires to prevent breathing on the wires or interior surface of the detector. A single human hair can permanently short out the wires it touches and coat the wires around it creating excessive current. A fingerprint may cause a high voltage breakdown with permanent carbon tracks requiring that area of the detector to be turned off. Proper quality control is a critical factor for detector lifetime.
Placing The Detector On The Stringing Fixture
Overview
The detector box must be installed onto the stringing fixture and adjusted precisely in order to string the wires. It is of critical importance that sufficient number of qualified personnel are assigned this task. A gantry crane with 3 manual chain hoists is used to pick up the detector box in a 3 point lift configuration. The detector box assembly is oriented to align and mount the the fixture. The detector is then rotated on the spit to the S1 and S4 position and locked in place. The magnet is then installed onto it's rails and placed at the neutral or stringing position. The stringing machine rail is then attached to the strongback. The stringing machine can then be installed and moved to the back plate to lower an alignment wire for adjusting the detector.
Crane Operations
The lead stringer or lead technician must be in charge of placing or removing the detector on the fixture. Crane operations must only be performed by qualified persons. Placement of the detector onto or off the stringing fixture requires a crew of 5 operators. Chain management for the 3 manual chain hoists is a critical issue. The importance is magnified once the detector has been strung and the window is in place. Loss of chain control of a qualified operator at all times. There must be 2 other persons available to move the gantry and attach the bolts. Once the strongback has been bolted to the fixture, the manual chain hoists can be removed from the assembly with all persons taking great care to control all chains and hooks. The hoists are then located to the end of the gantry and tied off.
Adjusting The Detector On The Spit
The detector must be adjusted on the fixture in order to string the wires. Each superlayer, SL1 and SL2, have opposite stereo angles requiring exact alignment of the upper and lower endplate holes. The lead string or lead technician must be in charge of adjusting the detector on the fixture. A minimum of 2 persons must be present in order to adjust the chamber, one to adjust the struts and the other to watch the alignment wire and give instructions to the adjuster.
An alignment wire is first strung to use as a guide. The SL2 wires are done first using a long wire hole at the end of the chamber. Then, the process is repeated for SL1 prior to string those wires. After the guard wires are finished, the process is repeated for the field wires. The main adjustment strut is either made longer for SL1 or Shorter for SL2. The maximum exposed thread length is 4.0" on the main adjuster strut. This limit must never be exceeded for any reason by any person. Exceeding this limit may result in injury and severe detector damage.
The spit adjustment struts are used to rotate the detector to the proper stereo angle. Only one spit adjuster strut can be used for adjustment at a time, the other must be disconnected. The adjustment range is 0-10 threads MAXIMUM past the lock nut or 0.55" MAXIMUM between the jam nut and rod. This limit must never be exceeded for any reason by any person. Exceeding this limit may result in injury and severe detector damage. Once the adjustment is complete the other strut is attached as a safety.
Pre-Tensioning
Pre-tensioning is performed prior to stringing the other wires in the chamber. CLAS12 R1 uses external compression springs and cables which are later removed. The center pre-tensioners must be installed prior to installing the covers. The 1 mil mylar covers must be in place prior to attaching the frame pre-tensioners.
The CLAS12 R1 uses a frame to hold the endplates. The frame is very strong, but still deflects due to wire tensions. In order to minimize wire tension and position error, the frame is pre-tensioned to simulate the full wire load. The pre-tension load is released as the wires are strung. After all the guard and field wires are strung, the pre-tension devices are removed. Then, the sense wires are strung.
Spring choice and specifications:
| Lee Spring - Part number: LCM200J 12 M | |
|---|---|
| Outside Diameter | 0.720" |
| Wire Diameter | 0.079" |
| Load Solid Length | 38.8 lbs |
| Free Length | 3.150" |
| Spring Rate | 18.70 lb/in |
| Solid Length | 1.076" |
| Rod Diameter (ID) | 0.546" |
| Wire Tensions | |
|---|---|
| Guard wire tension | 190 grams |
| Field wire tension | 62 grams |
| Sense wire tension | 18.2 grams |
| Spring heights | |
|---|---|
| Full preload | 1.75" |
| 1st stage adjustment | 2.1" after guard wires are strung |
| 2nd stage adjustment | Removal after field wires are strung |
Each row contains 1 guard, 7 field, and 3 sense wires:
There are 454 rows and taking into account the end guard wires, we get a total of 681.4 lbs.
There are 26 total pre-tensioners, where each pre-tension device is loaded to 26.2 lbs.
Initial spring height at 26.2 lbs is 1.75".
There are 14 pre-tensioners in the center of the endplate between the superlayers and 6 on each of the outer frames. Each uses the same spring and other components. The tensioners (per-tensioners), are split into 2 groups of 13 units. One group has yellow tape on the base while the other group is without tape. The yellow tape group is for SL1, while the group without tape is for SL2. The pre-tensioners are attached and adjusted to a spring height of 1.75" prior to stringing any wires.
During stringing, the pre-tensioners are adjusted as the wires are strung in two stages. Stage 1 adjustments are performed during guard wire stringing and stage 2 adjustments are performed during field wire stringing.
Stage 2 tensioner adjustment is performed after stringing the field wires past the pre-tensioner unit. Spring tension is released and the pre-tensioner unit is removed. Extreme care must be used when removing the center cables so not to come into contact with the other wires. A string/line is attached to the cable at the lower end, the pre-tensioner assembly is then removed by cutting the cable at a point below where the line is attached. Maintain some tension on the line to guide the cable out of the detector.
The pre-tensioners come in two types, the center units and the frame units. The center units are installed in the pre-tension holes located between superlayers. The first hole from the nose end is used and then one is placed at every other hole. A total of 14 center pre-tensioners are installed, the first is for SL2 (no tape). The next is for SL1 (with tape) and so on. The frame units are attached to brackets. These units can be re-used because no cutting is required to remove them.
Stringing And Tensioning The Wires
Special Considerations For Tensioning The Wires
- Due to the angle of the end plate and the required procedure, the tensioner must always work from the small end, or nose, of the chamber toward the long end, or back plate.
- The wire must exit the pin perpendicular to the end plate in order to be properly tensioned and crimped. When the wire is perpendicular to the end plate, any binding or friction from the wire contacting the pin or feed through will not affect the wire tension.
- The pre-tensioners must not be adjusted or altered in any manner after the tension has been set, except for the stage 1 and stage 2 adjustments.
- Special care must be taken not to perform any actions which could cause any change in wire tensions such as pushing, pulling, pressing, twisting, or bending the pin.
Stringing The Guard/Field/Sense Wires
The stringing procedure is virtually the same with the different wire types. The only real difference being the amount of weight required to tension the wires.
**Verify the magnet is off prior to beginning any stringing operation.**
**Check crimper gap using a feeler gauge and adjust as necessary.**
The following steps are repeated for each wire:
- The wire is lowered through the upper feed through into the chamber by the operator using the stringing machine and gold chain with steel needle assembly. This is performed extremely carefully as not to fall of the wire, twist the wire, wrap around adjacent wires, or damage adjacent wires.
- The magnetic catcher is inserted through the corresponding lower feed through by the catcher to pull the wire out of the chamber. If the chamber alignment is accurate enough, the magnetic catcher is not normally needed.
- The wire is lowered by the stringing machine. The stringing machine can be operated by the operator who will then listen to the instructions of the catcher as when to lower and stop the wire. The stringing machine can also be operated by the catcher using the remote, but this is normally done by the operator.
- The wire is lowered until approximately 6-12" of wire has come out of the bottom of the chamber.
- The operator cuts the wire with the carbide tool and carefully threads the crimp pin over the wire while not pulling the wire out of the catchers hands.
- The operator slides the pin down the wire and carefully seats it in the feed through.
- The operator then crimps the pin and informs the tensioner.
- The operator then cuts the wire as close as possible to the pin to prevent small stray pieces of wire from entering the chamber.
- Using the crimper, gently press the crimp pin into the feed through to make sure it is properly seated and was not pulled out during step 6 and 7.
- The catcher threads the pin over the wire and carefully seats it in the feed through.
- The tensioner positions the wire tensioning pulley assembly such that the wire hangs perpendicular to the end plate and concentric to the pin. The wires perpendicular position must be visually verified from 2 directions 90° apart.
- The tensioner attaches the 190 gram weight clip on the guard wire, 62 gram weight clip on the field wire, or 18.2 gram weight clip on the sense wire.
- The tensioner then attaches the 62 gram weight clip on the guard wire, 18.2 gram weight clip on the field wire, or 9 gram weight clip on the sense wire.
- The tensioner does a final check of the pin seating and wire perpendicularity.
- The tensioner then removes the 62 gram weight clip from the guard wire, 18.2 gram weight clip from the field wire, or 9 gram weight clip on the sense wire.
- The tensioner then carefully crimps the pin, taking care not to push the pin further into the feed through or to pull it out.
- The tensioner then cuts the wire as close as possible to the pin to prevent small stray pieces of wire from entering the chamber.
Testing Procedures
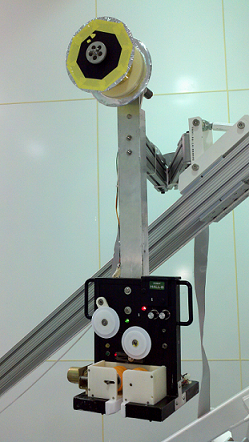
Wire Tension Measurement Method
Wire tensions are measured by varying the frequency of a current source with the wire in a magnetic field. The results are observed on an oscilloscope. The period is found by observing the resonance frequency on the oscilloscope using the XY-scale. The observed period is when the tensions are determined by the difference between the calibration period and the observed period at resonance for that particular wire. If the observed period is more than 10% higher or lower than the calibration period, the wire will need to be replaced.
The calibration period was found by an actual measurement of the resonant period of different lengths of the actual wire. A straight line was fitted to the observed data. A comma delineated table of individual wires and their lengths was inserted into a spreadsheet and the calibration periods for each were generated. The observed periods were entered into the spreadsheet and compared to the calibration values. The results were listed as a percentage in the column to the right and either a green OK or a red BAD in the one next to that. The spreadsheet was setup that six columns were visible: wire, minimum period, observed period, maximum period, percentage difference, and OK/BAD. The only editable column was for entering the observed period. This was designed to the fast, problem free, and simple to use in order to maximize efficiency.
Wire Tension Measurement Procedure
Preliminary discussion: This process works most efficiently with 3 people: an upper pin connector, a lower pin connector, and a computer-tension tester operator. The connections are made at each end of the wire at the pins by the upper and lower connector persons while the operator adjusts the frequency driver and enter the results into the spreadsheet. The spreadsheet should be setup such that the order of testing is the order of the rows listed so time is not wasted searching for the correct line in the file. Tension testing requires skill and experience. This can be a very time consuming process and errors can occur. Experience using the oscilloscope and driver box is critical in order to find crossed wires. Not all stringers will have the same level of observational and analytical skills. Supervisors should identify and assign jobs according to the skill of the stringers.
This test, by it's nature verifies continuity in each wire tested. This test will also identify crossed or twisted wires because of the drastic decrease in signal amplitude see on the oscilloscope. Whenever a wire is removed or restrung, all adjacent wires must be retested for proper tensioning. This is the only opportunity there is to restring and retest wires. Once the detector is removed from the stringing fixture, your options are very limited.
Tension Testing Procedure
**Be sure to remove any items that may be sensitive to high magnetic fields**
- Position the magnet and turn on the power supply. Use only the minimum current required to measure the tensions in order to minimize the heat produced by it. Keep in mind, the amplitude of the signal is proportional to the magnetic field.
- Position the testing station oscilloscope far enough from the magnet so it works correctly.
- Open the spreadsheet file for the wires being tested.
- The upper and lower connections are made on the wire to be tested.
- The tension tester driver is set to a period slightly below the minimum value in the spreadsheet row for that wire. This speeds up the process significantly by eliminating hunting, there is no need for a more time consuming search for the period if the wire requires pulling and restringing.
- The period is increased until a resonance is seen on the oscilloscope or until slightly above the maximum value. Tensions which are only slight too high (tight) can be reduced very slightly by pushing the pin in a tiny bit into the feed through. Wires with tensions that are too low (loose) are not salvageable.
- The resonance value is recorded in the appropriate column if found or if the value is not found, either too high or too low outside the range, the box is left blank. Blank boxes represent wires which need to be pulled and restrung.
- Once tension measurements are complete, be sure to turn the magnet off. Should any wires need to be restrung, the procedure can be found in section 5.2.
Final Pre-Instrumentation Testing
The next tests are as a second or last chance check for broken, shorted, or twisted wires that were somehow missed during the continuous visual inspection performed during the stringing process and then missed again during tension testing. These are the final tests prior to running cosmics. Wire wrapping the field and guard wire layers is a critical part of the testing process. The order and type of wire wrap performed is integrated into the testing process. Testing at each step verifies your OK at that point. This verification makes troubleshooting simpler and less time consuming. It is much less time consuming to identify these problems as they occur preventing unneeded labor and time uninstalling and then re-installing boards, cables, etc.
Sense Wire To Field Wire Shorts
The most common problem found has been and will be sense wires wrapped around or crossed with field wires. This is because the sense wire are strung after the field wires are already in place. Prior to signal and high voltage board installation, the field and guard wire layers are wire wrapped on the high voltage side only. Wire wrapping is done such that the buses face each other.
Each layer is wrapped in a single continuous bus with the buses facing each other. This maximizes the distance between the negative HV bus and the positive HV sense wire connection boots. When the end of the one field wire layer is reached wrapping continues to the next without a break in the wrap. This permits faster and better quality wire wrapping as well as a simpler testing procedure.
Once the HV side of the detector is wrapped, all guard wires will be bussed together and all field wires will be bussed together. A multimeter will be used to determine if there are any shorts between any field layers and any sense wires. A single connection from the multimeter to the field wrap on the high voltage side connects all field wires to the meter. The other lead is used to test every sense wire for a short to any field wire in the detector. This permits an entire chamber to be tested very rapidly. When a shorted sense wire is found, this sense wire should be removed. The pins need to be replaced to seal the resulting hole and it needs to be labeled and yellow mylar tape placed over the pins. The HVTB and STB should also be marked and the holes taped over. A list should be kept of these removed wires.
Field Wire To Field Wire Shorts
The second most common problem found will be the case of 2 field wires twisted together. A multimeter will also be used to determine shorts or twisted wires, by measuring the resistance between each field wire on the signal board side and the field wire wrap bus on the HV side. Twisted wires will have much lower resistance than the non-twisted wires nearby. In this case, you do not get a high voltage short because both wires are at the same negative potential. This problem may cause a hot sense wire or wires due to the localized increased electric field that results. It is not a recommended practice to remove field wires due to the high potential of damaging to nearby wires. It is also not recommended to remove the sense wires in this situation. The recommended and least invasive action is to simply disconnect the effected sense wires by labeling and placing yellow mylar tape over the pin. The effected sense wires will be the ones on either side of the cross only. The diagonal cells will lose some efficiency only and do not require any corrective action. The HVTB should also be marked and the hole taped over. A list should be kept of these disconnected wires. The STB side of these wires should be connected so they are not floating.
Sense Wire To Sense Wire Shorts
The lease likely problem to find is the sense to sense twisted wire. It is very unlikely that 2 sense wires can be twisted together without touching a field wire, but it is possible. This problem is less likely the smaller the cell size. We did not find any in CLAS6 R2, but for CLAS12 R3, this test may be useful. It is included here for completeness. This test will determine if any signal wires are crossed.
This is a HV test and the high voltage side wire wrap busses are now segmented by cutting the long continuous wrap into the prescribed 16 wire lengths. The high voltage boards are then installed and conductive rubber connections are made. If twisted sense wires are present and the HV is ramped up, these wires will be very "HOT" and draw high current due to their very close proximity to the field wires. These wires will cause the effected positive and negative HV channels to trip as they ramp up in voltage. This is not a hard short between positive and negative. The wires are too close at some point and the electric field will be too high and current will flow.
Once the high voltage trips due to high current, the HV boards can be identified. Typically, this means there is either a sense wire twisted with another in the same layer or that of an adjacent layer. A multimeter can then be used to measure the resistance between sense layers on the those boards. There should be infinite resistance between layers, any other result indicates a short or twisted pair of sense wires between those layers. The multimeter is also used to measure the resistance from the signal side of the wire to the high voltage bus. This should read ~1 megaohm, which is the value of the current limiting resistor in the circuit, where as a reading of 0.5 megaohm indicates a shorted or twisted pair within the same layer.
These wires must be disconnected from the HV. The holes in the HVTB should be marked and taped over. A list should be kept of these disconnected wires. The STB side of these wires should be connected so they are not floating.
Final HV Testing And Instrumentation
The STB side of the chamber can be wire wrapped. As was done on the HV side, each layer is wrapped in a single continuous bus. When the end of the one field wire layer is reached, wrapping continues to the next without a break in the wrap. This permits faster and better quality wire wrapping. Once complete, the wire wrap busses are then segmented by cutting the long continuous wrap into the prescribed 16 wire lengths. Once complete, the HV should be turned on to test for problems before installing the signal boards.
The next step is to install the signal boards and conductive boots to the signal pins. Once complete, the HV should be turned on once more to test for problems before installing the mylar or lexan covers to seal the HV areas of the electronics.