Difference between revisions of "Gumstix Installation"
Jump to navigation
Jump to search
| Line 11: | Line 11: | ||
;<math>I^2C</math> Connection | ;<math>I^2C</math> Connection | ||
| + | |||
| + | Connecting to the little board(i2c board) | ||
{| border="1" |cellpadding="20" cellspacing="0 | {| border="1" |cellpadding="20" cellspacing="0 | ||
| Line 25: | Line 27: | ||
|}<br> | |}<br> | ||
| + | On Gumstix: | ||
[[File:BreakOutGumstix_5.jpg|200px]] | [[File:BreakOutGumstix_5.jpg|200px]] | ||
Revision as of 21:44, 20 July 2009
- Establishing Connection with Gumstix
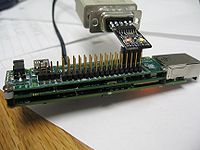
The serial connection with Gumstix can be established through the C-kermit or minicom. You can find instructions on the following web pageserial.
Make sure that the TTL RS232 adapter is connected correctly and red(shows that gumstix is connected) and yellow(serial cable) lights are On.
Gumstix username: root
Password:c0d/\2.0
- Connection
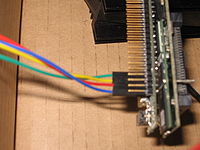
Connecting to the little board(i2c board)
| Cable side | Gumstix side |
| Blue | Yellow |
| White/Green | Red |
| White | Green |
| Green | Blue |
On Gumstix:

